123
123
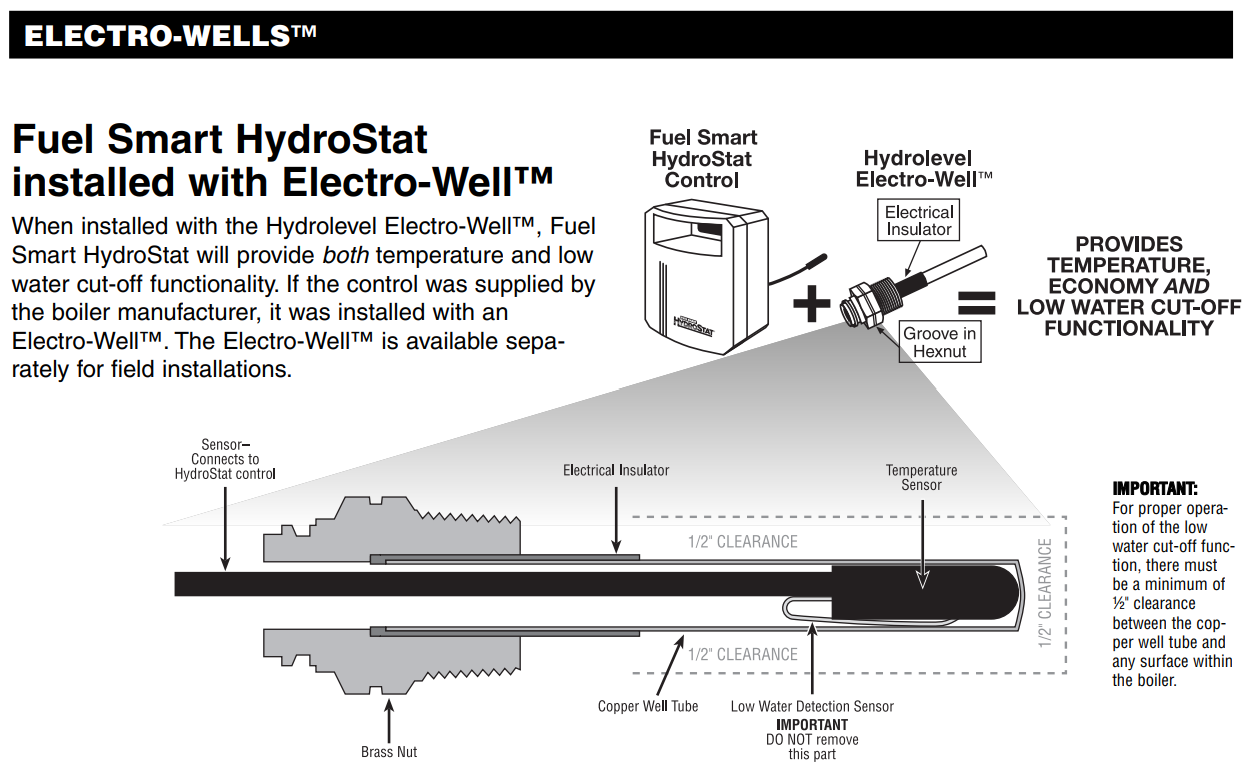
Hydro-Level Electro-Well Field Diagnostic
Target Model: HydroStat 3000 Series / CycleGard CG400 (Probe-Style)
Step 1: The "Visual Reality Check"
-
Action: Check the sight glass (Steam) or pressure gauge (Water).
-
The Logic: Is the boiler actually low on water, or is the sensor lying?
-
If water is low: Fix the feed system or find the leak.
-
If water is present: Proceed to Step 2.
-
Step 2: LED Logic Interpretation
Look at the light pattern on the Hydro-Level control box:
-
Solid Amber/Red "Low Water" Light: The control does not see a path to ground through the water.
-
Blinking Amber/Red Light: The system is in Manual Reset Lockout. (Push the "Test/Settings" button to reset).
-
Green Light (Blinking): The system is performing an Intermittent Level Test (common on CycleGard models). This is normal operation—wait 60 seconds.
Step 3: The "Ground" Test (Most Common Failure)
The Electro-Well uses the boiler shell as the return path.
-
Check: Did the installer use too much Teflon tape or pipe dope?
-
Test: Take a jumper wire. Touch one end to the Probe Terminal and the other to a clean, unpainted spot on the boiler chassis.
-
If the light goes out: You have a bad ground. Remove the probe, clean the threads, and reinstall with minimal sealant (metal-to-metal contact is required).
-
If the light stays on: Proceed to Step 4.
-
-
Check: Is there still air in the system?
-
If there is air in the system and there is a bubble around the probe, it will not be able to ground out. Remember, just because the system has pressure, doesn't mean there is not air in it.
-
Step 4: The "Coated Probe" Inspection
-
Action: Kill power, drain water to below the probe level, and remove the probe.
-
Check for:
-
Mineral Scale: White crusty buildup from hard water.
-
Oil/Sludge: A black, greasy film (common in new steam installs that weren't "skimmed" properly).
-
-
Fix: Scrub the metal probe with steel wool or a Scotch-Brite pad until the stainless steel is shiny. Do not use sandpaper (it leaves scratches that catch more minerals).
Step 5: Clearance Check
-
Action: Peer into the tapping where the probe sits.
-
Requirement: There must be at least 1/4" of clearance between the probe tip and any internal boiler wall or pipe.
-
The Logic: If the probe touches the side of the pipe, it creates a "false positive" (thinks there is water when there isn't) or a short.