267
267
When testing flame rectification or flame signal, the common method involves setting a meter to microamps DC, placing the meter in series with the flame rod, and then restarting the system. After recording the reading, the system must be shut down again to reconnect the wire. While effective, this process can be time-consuming.
Fortunately, some manufacturers include a flame current pad on the control board, offering a quicker and easier alternative for checking flame signal strength. However, these test points can be difficult to locate and may not always be mentioned in the service manual.
How to Use the Flame Current Pad
-
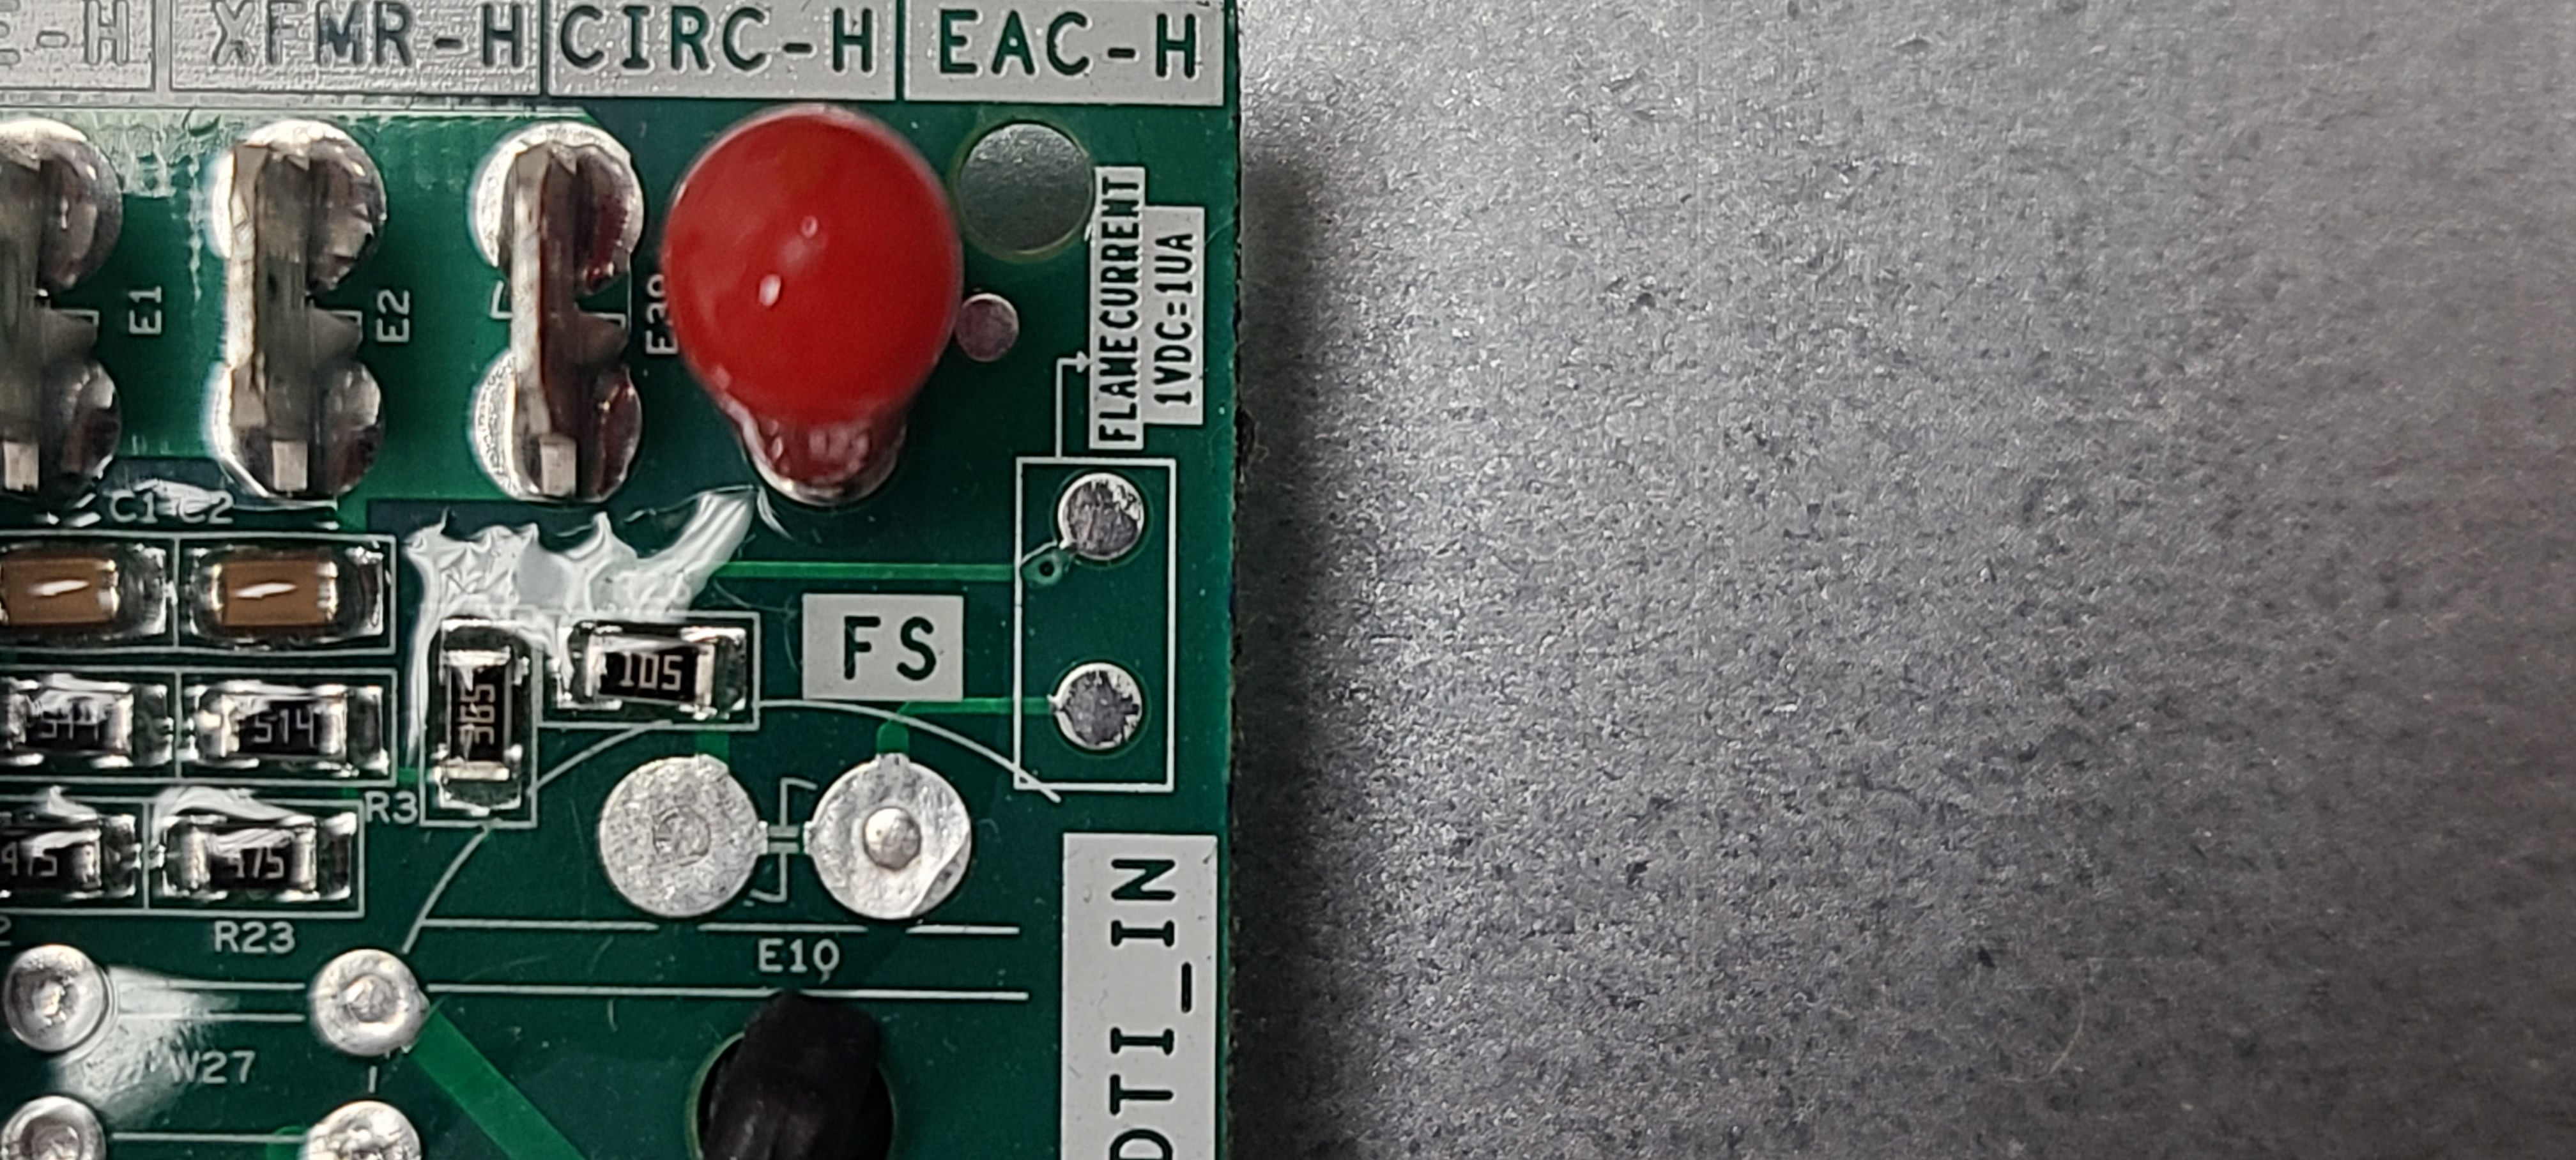
Locate the Flame Current Pad: Check the control board for a designated pad or test points labeled for flame current testing.
-
Set Your Meter: Adjust your meter to volts DC instead of microamps.
-
Identify Test Points: The pad will typically indicate which contact point is for the black lead (-) and which is for the red lead (+).
-
Take the Reading: Place your meter leads on the designated points and observe the voltage reading.
-
Convert Voltage to Microamps: Each 1 volt DC represents 1 microamp DC.
This method can save time and simplify the testing process without the need to interrupt system operation multiple times. We hope this information makes your troubleshooting faster and easier!
- Carlos